Rolladeck Instructions
Warnings For Use of the Rolladeck Windshield Setting System
Installers expected to follow industry code of practices standard for windshield removal and install
1. Never turn on the wipers or ignition key when Rolladeck is attached to vehicle. If it is necessary to turn on the ignition key, be sure to remove Rolladeck assembly from post, this will not affect the calibration of Rolladeck if the adjustment screws are not loosened.
2. Make sure there is enough clearance between the hood, fenders and pinchweld. The amount of clearance can be determined when removing the old windshield. There may be rare occasions where a tight fit between the fender edges and windshield hinder the use of Rolladeck. Make any necessary adjustments to the drop down, etc and test set with the old windshield.
3. Always make sure that the old windshield is completely cut free from urethane before rolling out on Rolladeck Never try to tear urethane by forcefully pulling on the windshield while it is on Rolladeck, as this may cause serious damage to the vehicle wiper assembly and Rolladeck tool.
4. Rolladeck uses sealed ball bearings, never attempt to lubricate rollers as this may contaminate new glass surfaces to be bonded.
5. As most all wiper post assemblies are made of solid steel and aluminum components, there are few that exist with composite materials that are subject to deterioration with age that can crumble under stress. Simply removing wiper arms can be problematic on these rare models (ie Saturn on, late 90’s model Chevy Malibu). Always inspect post mount assembly to determine if suitable to support light load.
Rolladeck Instructions Part I.
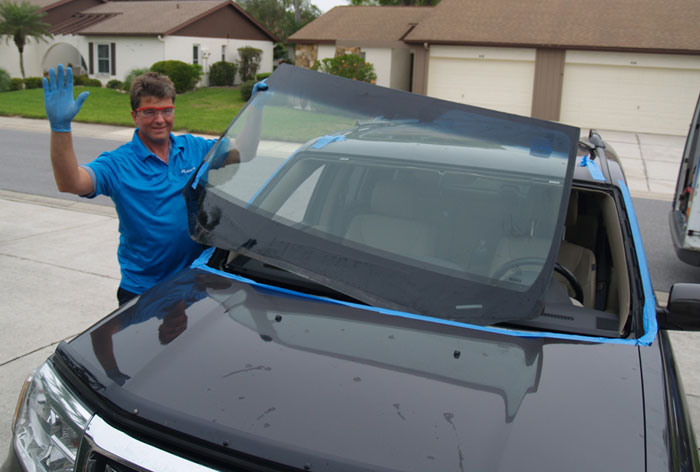
Removal of windshield and calibration of tool
1. Remove cowl screen and wiper arms.
2. Protect painted surfaces with protective tape.
3. Cut the windshield free from the urethane with method of choice (note* tape windshield at the top in place when it is cut free.)
4. Select appropriate sized base plate for the vehicle. Set base plate on the passenger side wiper post and gently secure, snug with vehicle’s wiper post nut. ( note* It is only necessary to snug the wiper post nut to the base plate. On serrated windshield post, gently secure nylon set screw. Over tightening is unnecessary and may damage the set screw and post. )
5. Select appropriate slide plate and fasten to the deck plate with the screws provided. This would be the time to determine if a drop down adjustment is required. If so, select appropriate screws and spacers provided in the hardware kit to create drop down adjustment. If the bottom of the tool is more than 1.5 in. above the glass level at rest, you may want to adjust drop down. (note* if the space between the glass post is close, pre-assemble Rolladeck).
6. Make sure windshield is completely cut free. (see warnings section) Lift the bottom of the windshield and slide Rolladeck rollers under the windshield until the rollers are pressed against the windshield. Lock the screws with allen wrench.
7. Remove tape at the top of the windshield and lift up onto Rolladeck, then roll the windshield out of the opening to the passenger side of the vehicle. You may remove the windshield through the driver’s side if the wiper post is further from center to the passenger side of the vehicle.
Rolladeck Instructions Part II.
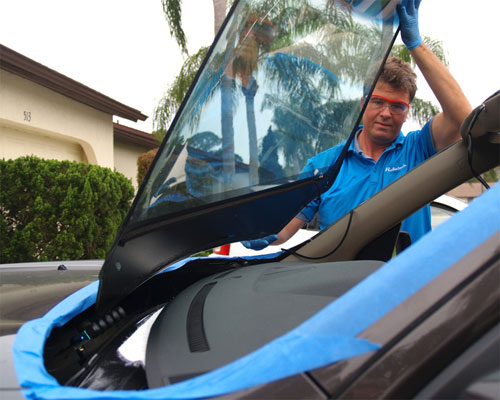
Installation
1. If there is no existing windshield to calibrate your Rolladeck you may want to measure new windshield height and adjust Rolladeck accordingly, allowing clearance from the roof to the deck surface, then position windshield and fine tune adjustments. (see steps 6 & 7 of removal instructions) (note* Dry setting is not necessary if he tool is pre-calibrated whenemoving the old windshield )
2. Prep vehicle opening for installation. If Rolladeck is in the way, you may remove assembly from the post. Do not loosen adjustments, make reference of the angle of the tool. Apply urethane bead to vehicle body, reset Rolladeck to post if needed. Using gloves and suction cups, set the windshield edge into the roller valley, roll into place, using line of sight to precisely place windshield into the opening.
3. Before pressing windshield into urethane, secure windshield at the top with tape. Lift the hood if necessary, and loosen the adjustment locking allen screws on the base plate. Lift the windshield at the bottom, slide deck plate out from under the windshield and drop the windshield into place. (note* if clearances between the wiper post and glass are too close, it may be necessary to place Rolladeck assembly on the post pre-assembled under the windshield, then remove assembly all as one when installing the windshield.) Press the windshield into place and remove Rolladeck assembly and complete assembly of vehicle.
Base Plate and Drop Down Adjustment Instructions
Begin by selecting the appropriate base plate that fits the wiper post. If the bore on the base plate if too large for the post, the spline of the post will protrude through the bore such as these examples in figures A and E.
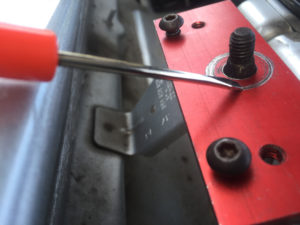
Figure A
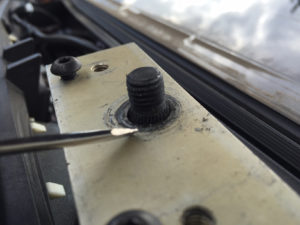
Figure E
If the base plate fits correctly, only the threads of the post will protrude. See figure B and F.
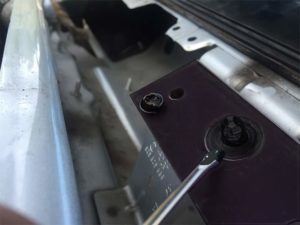
Figure B
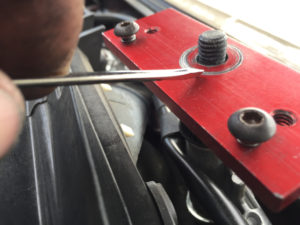
Figure F
Once the appropriate base plate has been selected, you may secure it with the existing wiper post nut. Each base plate is designed to be setup conventionally but can be reversed if necessary for clearance. See figure 1 and 2. If the base plate will not clear the cowl valley, it may be necessary to reverse the base plate.
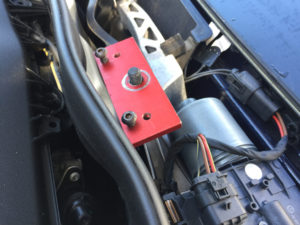
Figure 1
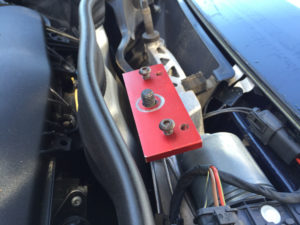
Figure 2
Select the appropriate slide plate of the 4 plates in your kit. This is done by measurement or by sight. Slide the slide plate over the base plate. Set screws and check the distance to the windshield at rest. This example that we’ve selected is too large for clearance in the cowl valley. See figure C.
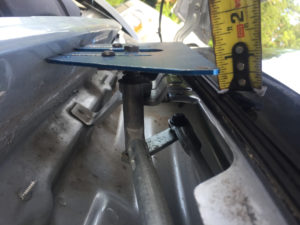
Figure C
It would be necessary to select the next size down for clearance. This will be a good time to determine if a drop down setting is necessary. Measure between the slide plate and the windshield at rest in the opening. If there is less than 1 1/2
inches, then a conventional setting is necessary. See figure 3. If there is more than 1 1/2 inches between the slide and the windshield, a single drop is necessary. See figure G.
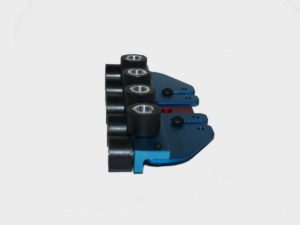
Figure 3
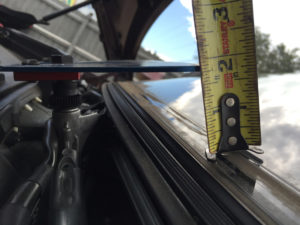
Figure G
If there is more than 2 1/2inches between the windshield and the slide, then a double drop is necessary. See figure H and I and 4 for single drop down configuration. See figure 5 for double drop down configuration.
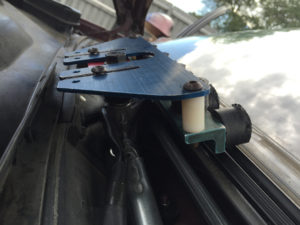
Figure H
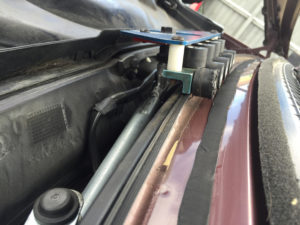
Figure I
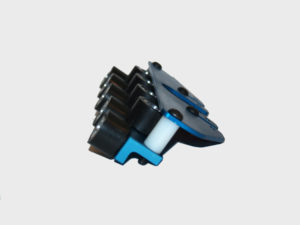
Figure 4
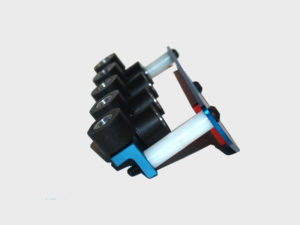
Figure 5

