Game Changer Instructions
Warnings For Use of the Game Changer
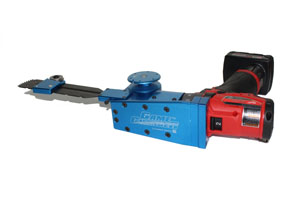
Thank you for the purchase of your new Game Changer wire cut out tool by Rolladeck Industries. We encourage you to read the full instruction guide before using the tool. If you have previously used a wire or a string cutting tool, you will already have some basic knowledge that will be used.
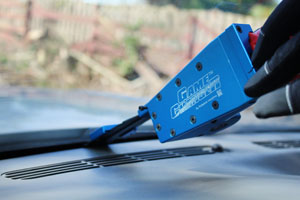
The 1st step in using any wire/string tool is to place a dash protector of your choice where you are going to start the cord/wire. Place the dash protector of your choice 6 to 8 inches from the right side of the vehicle. Assess the depth of the dash using one of the 2 anchor blade attachments. The attachment should be able to anchor into the urethane and be connected to the tool without the tool touching the dash. This will vary by make and model of the vehicle. See picture beside for length selection.
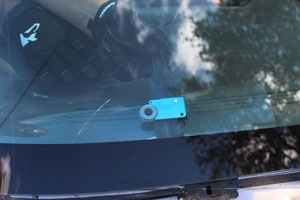
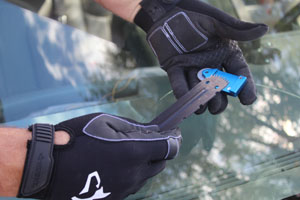
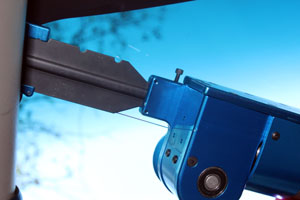
Your next step will be loading the adjustable counter pulley onto the anchor blade and selecting the optimal placement. Note: cord/wire cuts best when the counter pulley is adjusted as close to the anchor tongs as possible without coming in direct contact with obstructions like interior components, dashboard etc. Adjust your pulley so that the angle of the cord/string is as parallel as possible with the urethane bead. This will create an optimal cut angle and cause less wear and tear on the cutting element you are using. See picture on next page.
The tool is designed to be used from right to left. When starting your wire/cord, insert it to the bottom ideally 6 to 8 inches in form the passenger corner. Driver’s corner on vehicles with right side driver seats commonly used in UK and Australia, New Zealand etc. We suggest using a 3 foot-long length of cord to use as a starter, insert as shown in picture.
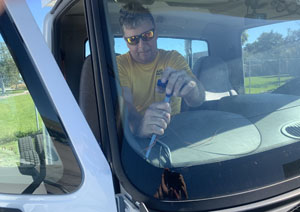
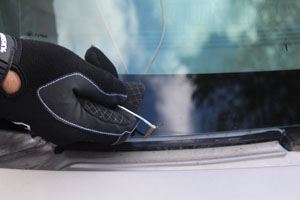
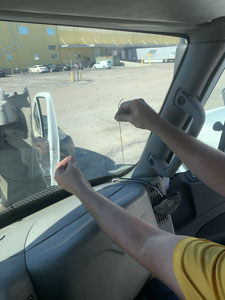
Insert the cutting line through the loop and pull at least 2 feet of line through the loop. Note: if using steel wire, fold the end of the wire to create a hook, then hook it through the loop of the starting cord. Remove starter tool and pull the starter line back into the vehicle. This will bring approximately 4 feet of cord into the vehicle. You will want to leave enough slack so that you can do at least 2 revolutions of the wire/cord onto the spool approximately 3 foot, as seen in pictures.
If you are using string, we suggest making a small knot at the end of the string and slide it into the slot on the pulley. This will prevent the string from falling out or slipping. It will also allow you to use less cord to secure the line to the pulley. When loading the pulley, it is key to load the cord clockwise. Spooling the cord counterclockwise will cause excessive drag and can shorten the life of the tool. See photo.
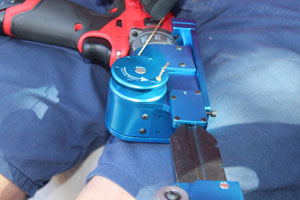
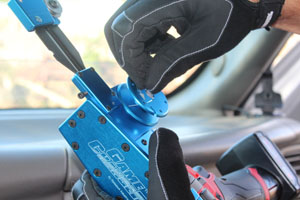
When using steel wire, insert the end of the wire into the hole on the pulley. Note: it is key that you wind the wire going clockwise. Do not wind the wire counter clockwise as it will cause more drag and reduce efficiency. See photo.
Then, from right to left, unwind your preferred cutting element from the supply spool and wrap it around the perimeter of the bonded part. Make sure that the element is tucked completely beneath the glass or bonded frame, especially in the corners. Try to avoid slack in the element, this will keep it in place for cutting. IMPORTANT! If you are working on a vehicle with a hidden pinch weld, such as a 2019 Toyota Camry, Mazda3 etc. take your time and make sure that the cutting element is secure against the urethane bead and not loose so that it could get caught or wrapped under the pinch weld. Failure to avoid this can cause irreparable damage to the pinch weld. Once the cutting element is completely around the perimeter, you can secure it to any fixed solid metal object like the wiper post, a mounting bolt etc. or the anchor cup provided. You may also wrap the element around the wiper post and redirect the element towards the center of the windshield and secure it to the anchor cup. This will prevent the element from cutting into moldings, cowl retainers on the glass edge or stressing the glass itself when attempting to salvage these parts. See photos.
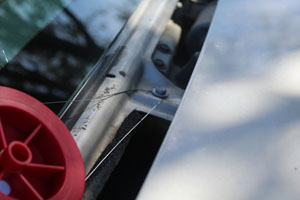
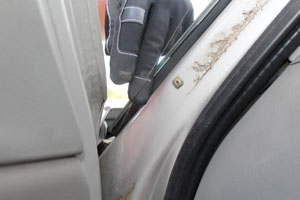
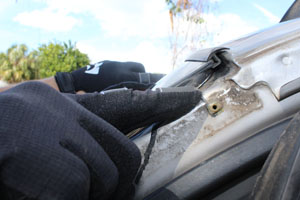
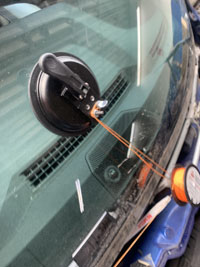
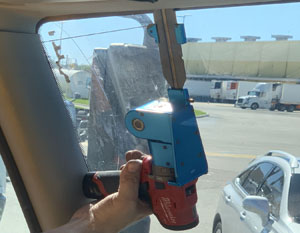
Some technicians prefer to anchor the cutting element inside the vehilce, should you choose to ue the inside anchor method using our provided anchor cup, please see the photo for proper setup to ensure the best results.
To begin cutting, push the anchor tongs into the urethane of the entry point of the cutting element and keep the drill handle pitched back towards the entry point so the top of the anchor blade is further away from the starting point then the rest of the tool. This will give the user leverage to engage the anchor tongs into the urethane and prevent slipping. Pull the trigger and watch as the cutting line approaches the anchor tongs, reverse the direction and unwind enough slack to reposition the tool to the desired point and resume cutting. Be careful not to allow the line to reach the anchor tongs as it can get caught on the tongs and break the cutting line. When reaching a corner and making a turn, bring the cutting line as close to the corner as possible without snagging the anchor tongs. This will make it easier to transition the cut around the corner. When ready to reposition the tool to make the cut up the driver’s pillar, put the anchor blade into the top corner at a 45 degree angle. Depending on the angle and the density of the bottom corner bead, it may require extra force to keep the anchor tongs locked into the urethane until the corner cut is completed.
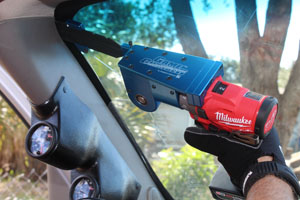

When transitioning the cut from the side to the top, start no more than 12-14’ from the corner to shorten the curve until the line reaches the tongs then proceed to cut along the top.
